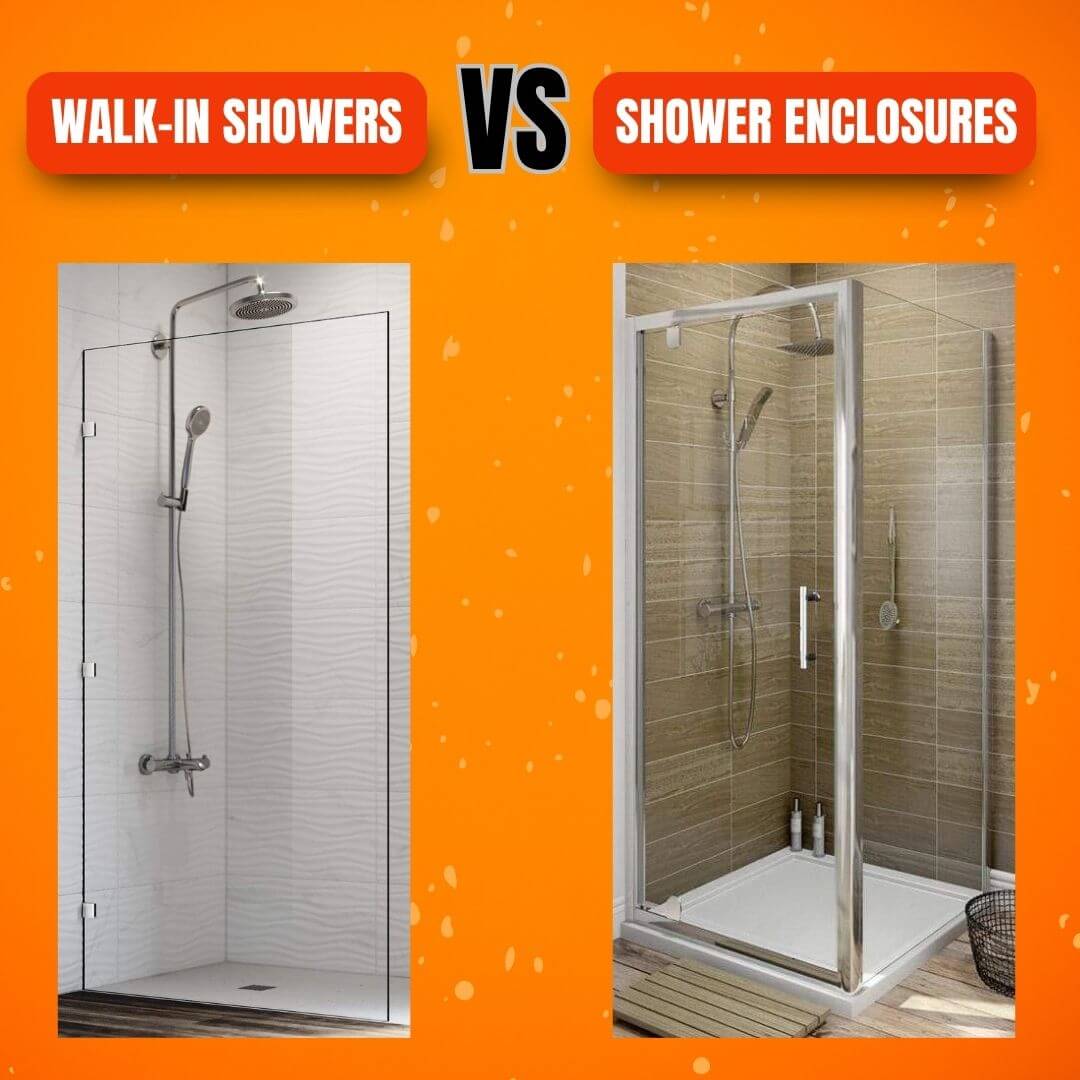
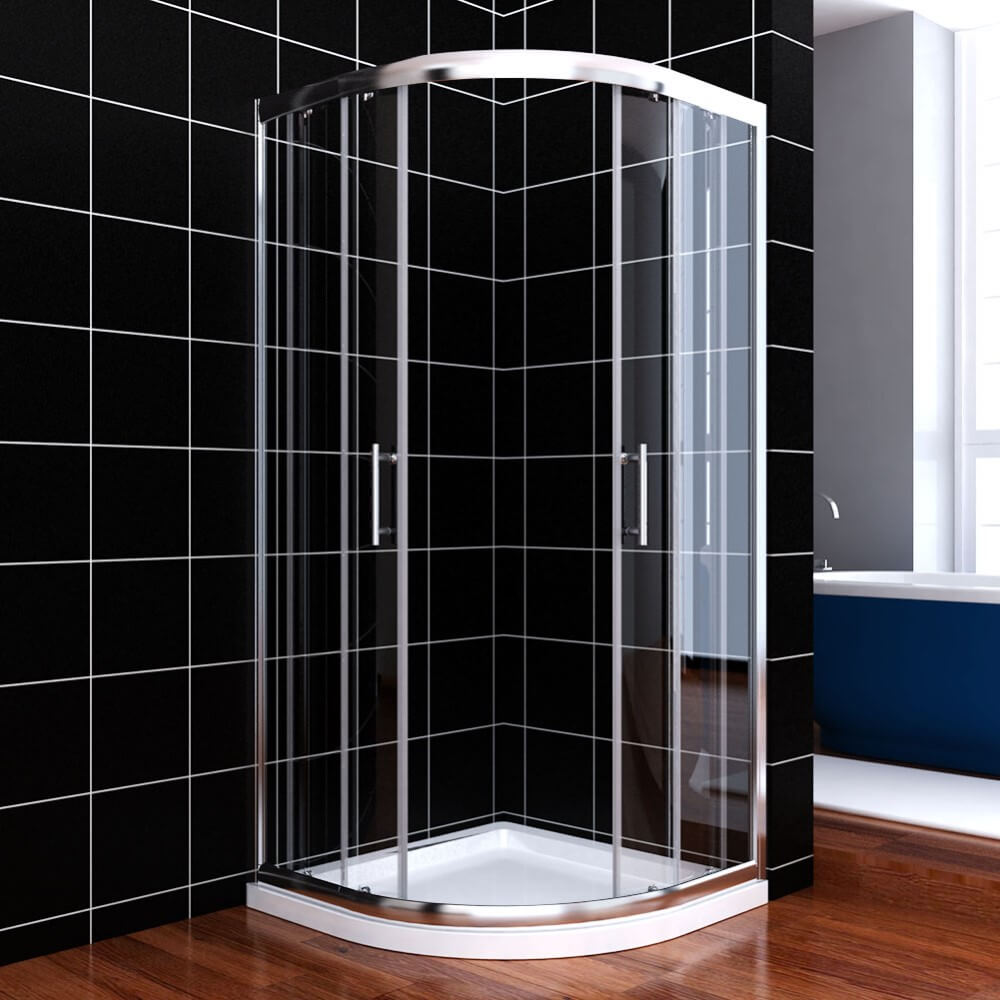
Installing a corner shower door is a task that, while challenging, can significantly enhance the functionality and aesthetics of a bathroom. This guide provides step-by-step instructions on how to successfully install a corner shower door:
Step 1: Preparation and Measurements
The first step is gathering the necessary tools and materials that will be required for the installation. Key items needed include:
- Tape Measure: For accurately measuring the corner area at both the base and top in multiple locations to account for any wall irregularities. Precise measurements are crucial for the proper alignment and operation of the door.
- Level: To check for plumb and ensure the frame gets mounted in an aligned vertical position.
- Drill: For drilling pilot holes into the walls to secure the frame mounts and anchors. Have the proper wall inserts or brackets recommended for your shower screen material.
- Silicone Caulk & Caulk Gun: Used as a waterproof sealant at frame joints and floors.
- Screwdriver: To secure hinges, tracks, and other door hardware components.
- Corner Shower Door Kit: Includes frame, door panel, sidelights if needed, rails/tracks, and all essential mounting hardware.
The process begins by carefully measuring both the width and height of the corner location at both the top and bottom. Consider the potential unevenness of walls and note any variances. These measurements will be used for accurate sizing and alignment of frame and door components after assembly. Precision at this stage allows for a properly operating door down the road.
Get more info for material: Shower Screen Materials: A Breakdown of Aluminum, Steel and Glass Options

Step 2: Assembling the Frame
With measurements complete, begin assembling the frame per the manufacturer's instructions. Typically, the kit contains metal uprights as well as horizontal headers to create the frame that gets anchored into the corner. Use a smooth, flat surface to lay out parts in alignment. Door panel sidelights, fixed glass panes, and the door itself are housed between the header sections.
Ensuring symmetrical positions and making small adjustments early when needed allows the unit to be balanced and prevents issues down the road after mounting. This step creates the underlying support structure to safely hold the weight of glass panels. Following guidelines prevents problems with door clearance or gaps once fully installed.
Step 3: Attaching the Frame to the Walls
With assembly complete, the entire corner frame unit gets set in place and attached to the walls. Check it is plumb using a level at vertical surface points. Mark pilot holes for the wall anchors or frame mount screws included with the hardware.
Follow the manufacturer's specs on the required placement. Drill holes and secure the frame tightly into the corner. Be sure to check for continued vertical alignment periodically as the process continues. The frame provides both structural integrity and an attachment point for the door itself. Properly securing it prevents misalignment or loose parts later on.
Step 4: Installing the Door

Door panels typically get installed right onto the frame itself. This may include setting hinges into the metal frame plus brackets along the closing edge. Sliding doors utilize rollers that must align with an upper track installed on headers.
Carefully hang the glass and make adjustments so it sits centered without rubbing sides. Ensure smooth operation by sliding or swinging the door and checking for clearance. Make minor tweaks so the gap remains constant around the perimeter once closed. This seals against water leakage while preventing the door itself from contact, which leads to glass shattering.
More universal install tips: How to Fit a Glass Shower Screen in Australian Homes?
Step 5: Sealing and Waterproofing
With the door fully functional, waterproofing begins by sealing all joints with quality silicone caulk. Place ample caulk beads at end frame connections to walls and along the bottom frame where it meets the tub or shower pan surface. Use a caulk gun to apply enough evenly to fill voids when smoothed out.
Then, take a damp fingertip or plastic finishing tool to smooth out the caulk into a nice finished bead, wiping away any excess. Follow manufacturer cure times before water exposure. Proper sealing prevents leaks leading to water damage behind walls or under flooring.
Step 6: Final Touches
Do a final comprehensive inspection, looking for any leaks, gaps, or parts that need adjusting, then make tweaks. Be sure door operation remains smooth after this step. Confirm vertical alignments are still precise after adjusting or sealing phases. Allow adequate caulk cure times as stated for readiness when taking that first shower.
By following essential preparation, assembly, installation, alignment, and waterproofing steps, a corner shower door can be professionally installed as a DIY project. Paying close attention to measurements, proper operation, and sealing are key to success. The result is an upgraded bathroom with better functionality and a beautiful focal styling point. Maintained properly, a custom corner shower door will provide an invigorating shower experience for many years.