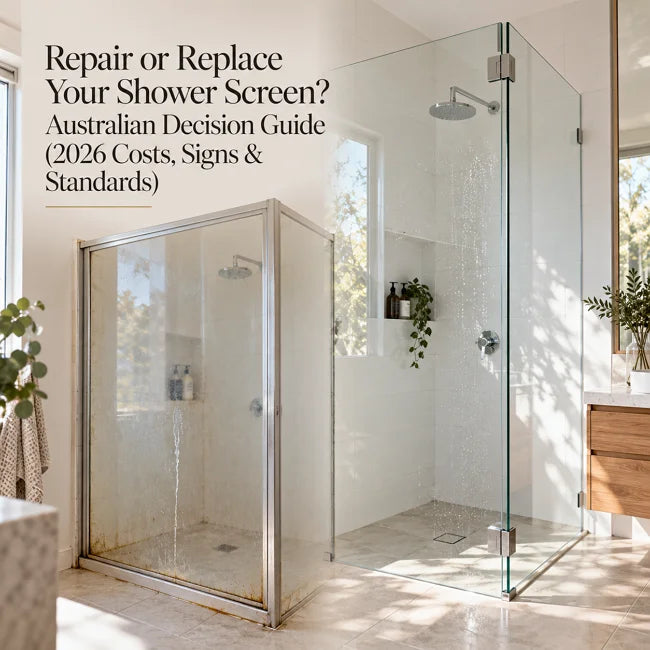

A good shower screen installation in Australia looks clean, feels solid, and performs silently for years—but its true quality lies beneath the surface. It is not simply a sheet of glass screwed to a wall. A good installation is a coordinated system of compliant safety glass, structurally anchored fixings, correctly interfaced waterproofing, and precise sealing that works with the floor fall, not against it. In a country where shower screen leaks are among the most common and costly bathroom defects, knowing what a good installation looks like is essential for any homeowner, renovator, or buyer. This guide breaks down the visible signs, the hidden compliance details, the red flags, and the Australian Standards that separate a professional job from a future problem.

The Visual Checklist: What a Good Shower Screen Installation Looks Like on Day One
A quality installation announces itself visually before you ever open the door. The first thing to inspect is the silicone bead. A good installation features a continuous, neatly tooled line of silicone along the wall channel, the floor junction, and any vertical joints. There should be no gaps, no smearing across the tiles, and no silicone bridging the waterstop in a way that blocks drainage or traps water. The bead should look deliberate, not rushed.
Next, check panel alignment and plumb. Frameless and semi-frameless screens should sit perfectly plumb and level, with even sight lines across fixed panels and doors. A spirit level placed against the vertical edge of the glass should show no leaning. If the bathroom walls are out of plumb—which is common in Australian homes—a good installer uses adjustable wall channels or packing shims to correct the discrepancy, rather than forcing the glass into a twisted position that will stress the hinges and seals over time.
Door operation is another immediate tell. The door should swing smoothly and quietly, without grinding, binding, or dragging on the floor or door sweep. Magnetic catches and seals should engage cleanly, and the gaps around the door perimeter should be consistent. A door that sticks, drops, or fails to close properly on day one is a sign of incorrect hinge adjustment or an out-of-level installation that will only worsen.
Finally, inspect the critical water-containment points: the floor-to-screen junction, the wall-to-screen junction, and the door-to-return-panel junction. A good installation minimises visible light gaps that allow splash escape, especially on frameless systems where there is no frame to hide imperfections. These junctions are where water will find its way out if the installation is not precise.

The Hidden Structural Checklist: What You Cannot See Matters More
The most important aspects of a shower screen installation are the ones you cannot see once the job is complete. A good installation begins with correct fixings. Hinges and wall brackets must be anchored into timber studs, masonry, or an appropriate structural substrate—never into tile or plasterboard alone. A common Australian failure is hinges screwed only into the tile surface, which leads to loose screens, cracked tiles, and eventual collapse. A professional installer plans fixing points before tiling or uses appropriate toggle bolts, chemical anchors, or wall plugs to achieve a secure hold.
Glass thickness and compliance markings are equally critical. In Australia, frameless shower screens typically use 10 mm toughened safety glass, while semi-frameless screens commonly use 6 mm or 8 mm toughened glass, and framed screens may use 4–6 mm. The glass must comply with AS/NZS 2208 and AS 1288, and it should carry a permanent marking—usually a small stamp on the glass edge—identifying the standard and nominal thickness. The NSW Government explicitly states that the minimum thickness of framed toughened glass is 4 mm, while partly framed and frameless toughened glass must be at least 6 mm. If you cannot find a compliance stamp, ask the installer for documentation.
The waterstop and waterproofing interface is a hidden detail that determines whether the shower will leak. The shower screen must interface correctly with the waterproofing system installed to AS 3740:2021. For enclosed showers without a hob or set-down, the standard requires a waterstop positioned so that its vertical leg finishes a minimum of 5 mm above the finished floor level. The screen is not the waterproofing; it is part of the splash-management system, and a good installation respects the waterstop rather than covering or compromising it.
Finally, a good installation depends on a correct fall to the waste. Water must flow toward the drain, not pool at the screen line. If the floor falls away from the waste, even a perfectly installed screen will appear to leak. Australian Standards typically require a minimum fall of 1:80 to the waste in shower areas. Before blaming the glass, a good installer or inspector will test the floor fall.

Australian Standards and Compliance: How to Verify a “Good” Installation
A shower screen installation cannot be judged “good” in Australia unless it complies with the relevant standards and building codes. The primary waterproofing standard is AS 3740:2021, Waterproofing of domestic wet areas. This standard sets out the requirements for waterstops, membrane installation, and the interface between the shower screen and the waterproofed substrate. A compliant installation should be supported by a waterproofing certificate, and the work should be coordinated between the waterproofer, tiler, and glazier. Under AS 3740:2021, where a shower area is within 200 mm of a bathroom doorway, the shower must be enclosed with additional water-containment measures, including a vertical waterstop where the screen meets the wall.
Glass compliance is governed by AS 1288 (Glass in buildings—Selection and installation) and AS/NZS 2208 (Safety glazing materials in buildings). AS 1288 specifies that glass used in shower screens must be Grade A safety glass—either toughened or laminated—or Grade B wired safety glass, and it sets minimum thickness requirements for human impact safety. AS/NZS 2208 details the test requirements for toughened glass. A good installation uses glass that meets these standards, and the installer should be able to provide evidence of compliance upon request.
Licensed trades and statutory warranties provide the final layer of verification. In Australia, installation should be carried out by a licensed glazier or a registered builder where required. Workmanship warranties vary—some installers offer a 12-month workmanship warranty, while others offer two years or more—but statutory warranties apply regardless. In New South Wales, the Home Building Act 1989 implies warranties that work will be done with due care and skill, with a warranty period of 6 years for major defects and 2 years for non-structural defects. Similar statutory protections exist in other states. A good installation comes with clear warranty documentation and a compliance paper trail.
Frameless vs Semi-Frameless vs Framed: What “Good” Looks Different For Each Type
The definition of a “good” installation shifts depending on the type of shower screen, because each system places different demands on the building fabric and the installer’s skill.
Frameless shower screens are the least forgiving. Good frameless installation requires plumb walls, square openings, and a correct floor fall, because there is no frame to hide gaps or accommodate variation. The glass is typically 10 mm toughened, and the hardware is minimal, leaving nowhere for error to hide. A good frameless installation looks almost invisible: the glass sits flush, the hinges are tight, and the silicone lines are the only visible connection between glass and tile. Because frameless screens rely on precise tolerances, they should always be measured and fitted by an experienced installer rather than adjusted after the fact.
Semi-frameless shower screens are more forgiving of minor wall variation. Good semi-frameless installation uses adjustable channels that can accommodate 10–20 mm of discrepancy without twisting the glass. The frame should be straight, mitred cleanly at corners, and sealed without gaps. A poor semi-frameless installation is easy to spot: the frame looks twisted or forced, the corners do not meet neatly, and the door may not sit square. A good one uses the frame to create a clean, intentional line that complements the bathroom rather than compensating for poor substrate preparation.
Framed shower screens are the most robust and water-tight by design, but good framed installation still requires care. The frame should show even alignment, secure corner joins, and smooth door tracks. The frame must not be used to conceal missing waterproofing, a poorly formed shower base, or inadequate floor fall. A good framed installation is level, securely anchored, and sealed with the same attention to detail as a frameless system, even though the frame provides a greater margin for error.

Red Flags: What a Bad Shower Screen Installation Looks Like
Knowing what to avoid is as important as knowing what to look for. A bad installation often reveals itself through silicone applied over tile only. Silicone will not adhere properly to dusty, wet, or oily tiles, and a good installer prepares the surface before sealing. If the silicone is already peeling, smeared, or tacky on handover, the installation is compromised from the start.
Hinges screwed into tile without stud anchoring are a widespread and dangerous red flag. Without structural fixing, the weight of the glass is carried by the tile and adhesive, which can fail without warning, causing the screen to drop or shatter. This is particularly common in renovations where the installer did not plan fixing points before tiling.
A door that drags, has uneven gaps, or swings poorly indicates out-of-plumb walls or incorrect hinge adjustment. A good installer corrects these issues before handover; a bad one leaves the homeowner to discover them after the invoice is paid. Similarly, water pooling at the screen line is often a floor-fall issue rather than a glass issue, and a good installation should be tested with water before sign-off. If water pools or escapes during a simple spray test, the installation is not finished.
Mismatched hardware finishes and visible scratches are quality-control red flags. Hardware should match across hinges, handles, and brackets, and glass edges should be polished with no scratches on handover. These details signal whether the installer takes pride in the finished product or simply rushed to complete the job.
How to Inspect a Shower Screen Installation: A Practical Australian Checklist
You do not need to be a glazier to perform a meaningful inspection. Before signing off on an installation, use this checklist:
-
Spirit-level check on vertical and horizontal planes: place a level on the top edge of fixed panels and against the vertical edge of the door. There should be no visible lean.
-
Door swing test: open and close the door through its full arc. It should clear tapware, the vanity, and towel rails without contact, and it should close smoothly without force.
-
Seal integrity check: run a finger along the silicone bead. It should be smooth, firmly adhered, and free of gaps or tackiness. Check the wall channel, floor junction, and any vertical joints.
-
Water test: direct the shower spray at the screen for 2–3 minutes. Watch for water escaping at the floor line, wall junction, or door edges. Some minor splash is normal, but pooling or steady leakage is not.
-
Fixing check: gently press the hinges and wall brackets. There should be no movement, creaking, or flex. Any movement indicates inadequate anchoring.
-
Glass marking check: confirm the AS/NZS 2208 stamp and the nominal thickness marking on the glass edge. If it is missing, request compliance documentation.
This inspection should be completed before the installer leaves the site, so any issues can be corrected immediately.
FAQs: Shower Screen Installation Questions Australians Actually Ask
Do frameless shower screens leak?
Not inherently. Frameless screens do not leak because they lack a frame; leaks almost always trace back to poor installation, incorrect floor fall, worn silicone, failed seals, or inadequate waterproofing beneath the tiles. When fitted correctly to a compliant substrate, a frameless screen is as watertight as a framed one.
What is the best glass thickness for a shower screen in Australia?
Frameless screens typically use 10 mm toughened safety glass; semi-frameless screens commonly use 6 mm or 8 mm; and framed screens may use 4–6 mm. All glass must comply with AS/NZS 2208 and AS 1288, and partly framed and frameless toughened glass must be at least 6 mm.
How long does a shower screen installation take?
A straightforward replacement typically takes 1–3 hours on site. Frameless custom installations usually involve two visits: the first to measure and template, and the second to install the fabricated glass. Semi-frameless and framed screens are more commonly completed in a single visit.
What warranty should a good shower screen installation come with?
Workmanship warranties vary but commonly range from 12 months to 2 years, alongside manufacturer warranties on glass and hardware. Statutory warranties also apply—for example, 6 years for major defects and 2 years for non-structural defects under the Home Building Act in NSW. Always confirm warranty terms in writing.
How do I stop my frameless shower screen from leaking?
First check the floor fall and drainage: if water pools at the screen line, the issue is likely the floor, not the glass. Next inspect the silicone bead and door seals for cracks, shrinkage, or lifting, and replace them if worn. If the leak persists, check the showerhead angle and confirm the waterproofing beneath the tiles is intact. Most leaks are solved by re-sealing or replacing worn components rather than replacing the screen.
Conclusion: The Mark of a Good Shower Screen Installation
A good shower screen installation is visually clean, structurally sound, and fully compliant with Australian Standards. It looks plumb and level, seals neatly, and operates smoothly on day one—but more importantly, it stays that way because the hidden work was done correctly. The fixings are anchored into structure, the glass is compliant and correctly thicknessed, the waterstop is respected, and the floor falls to the waste. By inspecting both the visible details and the compliance paper trail, and by choosing a licensed installer who provides a clear warranty, Australian homeowners can avoid the most common and costly shower screen failures and enjoy a bathroom that performs as well as it looks.
Ready to explore your options? If you are planning a bathroom renovation or upgrading an existing shower, Elegant Showers offers a comprehensive range of Australian-compliant shower screen solutions to suit every layout and budget. From sleek frameless walk-in panels and semi-frameless enclosures to practical over-bath screens and sliding door systems, their product range is supported by detailed installation guides and technical resources covering AS1288 compliance and waterproofing coordination. Whether you are a homeowner researching specifications or a trade professional sourcing compliant systems, visit elegantshowers.com.au to compare shower screen installation options, review technical specifications, and find the right solution for your next project.